 By Emily Parker
Updated November 2026
Interior trim painting ideas can transform a room without moving a single piece of furniture. The right trim color, sheen and finish frame your walls, define your doorways and give baseboards and crown molding a crisp, finished look. In this guide, we walk through how we’d approach the decision, from choosing a color scheme to prepping and painting, so you can plan a trim project that looks deliberate rather than rushed.
Start With the Trim Look You Want
Before you open a can, decide what role the trim should play. Trim can blend into the wall, creating a quiet, seamless room, or it can stand out as a deliberate accent. Most homeowners land on one of three approaches, and each one suits different architecture and furniture.
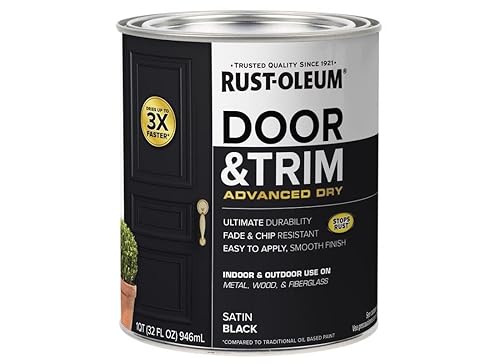
Shopping for one? See our guide: 6 Best Products for Painting Interior Doors and Trim: Our Picks Compared.
- Tone-on-tone: Trim painted the same color as the walls, often in a slightly different sheen. This hides imperfections and works well in modern or minimal spaces.
- Classic white or off-white: The traditional choice. It reads clean and bright against most wall colors and suits nearly every architectural style.
- Bold accent trim: Deep navy, charcoal, forest green or a warm terracotta. This makes the trim a design feature, especially around tall windows, built-ins or a grand front entry.
Pairing Trim Colors With Wall Colors
If your walls are a warm greige, a warm white trim with a creamy undertone will look cohesive. Cool gray walls often pair better with a crisp, bright white so the trim does not look yellowed. For a dramatic look, try dark trim against a light wall, or a deep wall color with trim one or two shades lighter. Always test samples on your actual trim, since the same paint looks different on wood, MDF and primed finger-jointed pine.
Seven Trim Painting Ideas Worth Considering
Here are seven directions homeowners commonly explore, along with where each works best.
- Crisp white throughout: Baseboards, casings and crown all in one bright white. Safe, timeless and easy to maintain.
- Two-tone baseboards: Walls in one color, baseboards in a slightly darker or lighter shade. Good for adding depth to a plain room.
- Matte black trim: Popular in modern farmhouse and contemporary homes. Use a durable satin or semi-gloss so it resists scuffs.
- Painted window frames in a jewel tone: Deep green or blue around a window draws the eye and suits reading nooks or dining rooms.
- Colored door casings: Painting only the casings in an accent color creates a custom framed look at each doorway.
- Ceiling-height wainscot trim: Adding picture-frame molding in a contrasting trim color below the chair rail.
- All-trim in a warm neutral: Taupe or mushroom trim with complementary walls for a layered, calm palette.
Choosing the Right Sheen
Trim takes more wear than walls. Door frames get bumped, baseboards get kicked and window sills collect moisture. Sheen matters as much as color.
| Trim Area | Recommended Sheen | Why |
|---|---|---|
| Baseboards | Semi-gloss or satin | Scrubs clean and resists scuffs |
| Door casings and jambs | Semi-gloss | Handles frequent hand contact |
| Crown molding | Satin or eggshell | Less glare on high surfaces |
| Window sills | Semi-gloss | Tolerates humidity and condensation |
| Bathroom trim | Semi-gloss, moisture-resistant | Handles steam and cleaning |
Manufacturers typically specify that higher-gloss sheens are easier to wipe clean but show surface flaws more clearly, so thorough prep matters more as the sheen gets glossier.
Step-by-Step: How to Paint Interior Trim
Step 1: Gather Your Supplies
You will need the following for a typical room:
- Painter’s tape and a utility knife for clean lines
- Drop cloths and plastic sheeting
- Sandpaper in 120 and 220 grit, or a sanding sponge
- Wood filler or spackle for nail holes and gaps
- Stain-blocking primer, especially over knots, stains or a color change
- A 2-inch angled brush for cutting in and a 1.5-inch brush for detail work
- A small foam roller for flat profiles like baseboards
- Denatured alcohol or a degreaser for cleaning
For a full list of materials and how to organize them, see our guide to Supplies for Interior Painting: A Step-by-Step Checklist for Homeowners.
Step 2: Clean and Sand
Wipe every surface with a mild degreaser to remove oils from hands and kitchen air. Then scuff-sand glossy trim lightly with 220-grit paper so the new coat has tooth. Vacuum the dust before you move on.
Step 3: Fill, Sand and Prime
Fill nail holes and seams with a wood filler, let it dry fully, then sand smooth. Prime bare wood, MDF and filled areas. A stain-blocking primer is worth the extra effort when you are changing from a dark color to a light one.
Step 4: Tape and Protect
Tape the edges where trim meets walls and floors. Press the tape firmly with a putty knife so paint does not bleed underneath. Protect floors with drop cloths extending a few inches past the baseboards.
Step 5: Paint in the Right Order
Work from the top of the room down. Paint crown molding first, then window and door casings, then baseboards last. Within each element, paint the recessed panels or grooves first, then the flat faces, then the edges. Use thin coats, typically two, and let each dry according to the can’s recoat time.
Step 6: Cure Before Use
Paint can feel dry within hours but needs days or weeks to fully cure. Avoid heavy wiping, slamming doors or placing objects against fresh trim during that period. Most manufacturers specify a longer cure time than dry-to-touch time, so check the label.
Common Mistakes to Avoid
- Skipping primer on bare wood: Unprimed wood drinks paint, leaving blotchy, uneven color.
- Using wall paint on trim: Flat or eggshell finishes wear poorly on high-contact surfaces.
- Overloading the brush: Heavy coats drip and sag, especially on profiles and corners.
- Removing tape too late: Waiting until paint is fully hard can peel fresh edges. Pull tape at a slight angle while the paint is still slightly tacky.
- Testing colors on white paper: Always test on the trim itself, under your room’s actual lighting.
Tips for a Cleaner Finish
- Paint trim before walls if you are doing both, so drips and touch-ups are easy to correct afterward.
- Keep a damp cloth handy to wipe any paint that strays onto walls before it dries.
- Work in good light, ideally with a portable LED lamp held at a low angle to spot missed spots.
- Store leftover paint with labels so future touch-ups match exactly.
- If you are planning a larger project, our overview of Interior Trim Painting Cost: What to Expect and How to Plan Your Project can help you budget time and materials.
Recommended gear
These items are widely used by DIY painters working on trim and doors, and each addresses a common frustration.
- Purdy Clearcut angled brush: An angled sash brush gives sharp control when cutting along casings and window muntins. View on Amazon
- Wooster Mini Ultra-Pro foam roller: Small rollers help apply smooth coats on flat baseboards without lap marks. View on Amazon
- 3M ScotchBlue painter’s tape: Designed to resist bleed-through on trim edges when pressed firmly. View on Amazon
- Zinsser BIN shellac-based primer: A stain-blocking primer that handles knots, water stains and tannin bleed. View on Amazon
FAQ
What is the most popular trim color?
Warm white and crisp white remain the most common choices because they suit most wall colors and architectural styles. Trends shift, but a clean white is the lowest-risk starting point for most homes.
Should trim be a different color from the walls?
Not necessarily. Tone-on-tone trim looks modern and cohesive, while contrasting trim adds definition. Choose based on how much visual separation you want between wall and trim.
What sheen should I use on baseboards?
Semi-gloss or satin is typically recommended because it cleans easily and resists scuffs. Higher-gloss sheens show more surface imperfections, so prep carefully.
Do I need primer before painting trim?
Usually yes, especially on bare wood, MDF, filled areas or when changing to a much lighter color. A stain-blocking primer is helpful over knots or water stains.
How many coats of trim paint do I need?
Most projects look best with two thin coats over primer. Dark colors over light trim may need an additional coat for full coverage. Always follow the manufacturer’s recoat window.
Can I paint trim while the room is occupied?
You can, but ventilate well, keep kids and pets away from wet paint, and protect furniture. Low-odor water-based paints make this easier. If you have concerns about lead paint in an older home or chemical sensitivities, consult a professional before disturbing old finishes.
How long does trim paint take to cure?
Paint may feel dry within hours but often needs several days to a few weeks to reach full hardness. Avoid heavy contact during that time and check the product label for the specific cure window.
Is it hard to paint trim as a beginner?
Trim is manageable for beginners if you go slowly, use quality tape, and work in thin coats. Practicing on a closet door or inside a cabinet first can build confidence.
Conclusion
Good trim painting comes down to three decisions: the look you want, the sheen that suits each surface, and the patience to prep properly. Start with a color plan, test samples on your real trim, and work methodically from top to bottom. With those pieces in place, your trim will look sharp for years.
Related reading
Ready to choose one?
About Emily Parker
Emily Parker is part of our editorial team and reviews and edits our DIY home renovation guides, checking product details against manufacturer specifications and owner feedback.