By Owen Palmer
Updated November 2026
A trailer home bathroom remodel is less about swapping finishes and more about working with a structure that was built to be light, compact and transportable. In this guide, we will walk through how to assess the existing bathroom, repair hidden damage, waterproof the floor and walls, and install new fixtures and finishes that hold up over time. By the end, you will have a clear sequence to follow and a sense of where most people run into trouble.
Our own project started with a soft spot near the tub that we almost ignored. Once we pulled up the old vinyl, we found the subfloor had been wet for years. That discovery shaped everything that followed, so we will start there.
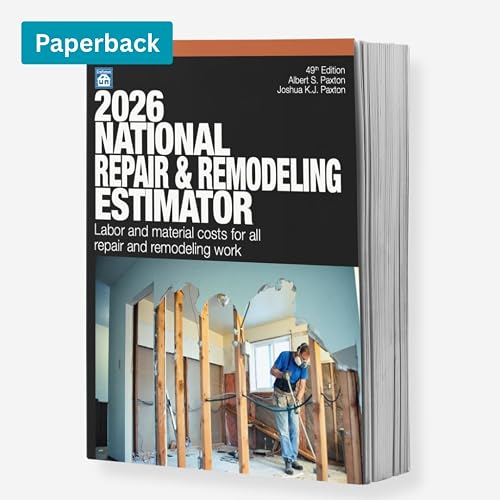
Shopping for one? See our guide: 3 Best Books for Remodel Bathroom in Mobile Home (2026).
Start With an Inspection Before You Buy Anything
Before you pick out a vanity or tile, spend a full day inspecting the bathroom. Manufactured and trailer homes often have subfloors made of particleboard or thin plywood over a steel chassis, and moisture from a leaking shower pan or toilet seal can soften these layers quickly.
What to check
- Press firmly on the floor around the toilet, tub and shower. Any give or springiness suggests rot or delamination.
- Look underneath, if you can access the belly board, for staining, sagging insulation or drips.
- Check the wall studs and corners for dark staining, soft drywall or a musty smell.
- Test the drain and supply lines for slow drips by running water and watching the joints for several minutes.
- Confirm the exhaust fan vents outside, not into the attic or the crawl space.
If you find extensive rot, or if the floor sits lower than the rest of the house, consider having a qualified contractor or structural professional look at the framing before you proceed. Water damage in a trailer home can affect the chassis and tie-downs, and that is not a job for guesswork.
Plan the Layout and Measure Carefully
Trailer home bathrooms are often narrow, and standard fixture sizes do not always fit. Measure the room at floor level and at shoulder height, noting any wall offsets, door swing and window placement. Then decide whether you are keeping the existing plumbing locations. Moving a drain line in a trailer home is possible but adds time, cost and the need to protect the underfloor area.
| Fixture | Typical planning dimension | Notes for trailer homes |
|---|---|---|
| Toilet | About 15 inches from wall to center of drain (rough-in) | Confirm the existing rough-in before buying |
| Standard tub | About 60 inches long | Often the biggest space decision in a small room |
| Shower stall | About 36 inches square is a common minimum | A 30-inch stall can work but leaves less elbow room |
| Pocket door | Needs about the door width inside the wall | Useful where a swing door would hit the vanity |
Dimensions vary by manufacturer, so check the spec sheets for the exact fixtures you plan to buy. Sketch the room on graph paper or a free planning app and mark the door swing, the toilet clearance and the vanity drawer path.
Repair the Subfloor and Framing
This is the step that most people underestimate. Once the floor is cleared, cut out any soft or stained subfloor back to solid material, extending the cut to the nearest joist or framing member. Replace the damaged section with new subfloor of matching thickness, and use construction adhesive along with screws rather than nails alone.
Basic repair sequence
- Shut off the water supply and disconnect the toilet and any other fixtures in the affected area.
- Mark the damaged area with a straight edge and cut it out with a circular saw set to the depth of the subfloor.
- Inspect the joists or chassis rails for rot. Sister in new lumber if the framing is weakened.
- Cut replacement subfloor sheets to fit, leaving a small gap at the edges for expansion.
- Fasten with screws spaced about 6 inches apart at the edges and 12 inches in the field, then check for flatness.
If the damage reaches the rim joists or the chassis, stop and consult a professional. Structural repairs on a manufactured home can affect the warranty and the home’s compliance with local codes.
Waterproof the Floor, Walls and Shower Area
Waterproofing separates a remodel that lasts from one that fails within a few years. In the shower, use a cement board or a foam-based backer board rated for wet areas, sealing all seams and fasteners. Install a liquid membrane or sheet membrane over the backer board, and extend it at least 6 inches above the shower head height or the top of the tile zone.
On the floor, consider a waterproof underlayment before laying your finish flooring. Luxury vinyl plank is a common choice for trailer home bathrooms because it is water-resistant and light. If you want to compare it against other options, our guide to Vinyl or Laminate Flooring (2026): Which Is Better for Your Home? covers the trade-offs in detail. Note that laminate can swell at the seams if water reaches it, so it is usually a poor fit for bathrooms.
For additional background on planning the whole project, see Remodel Manufactured Home Bathroom: A Step-by-Step Guide for Beginners, which walks through many of the same steps in a different order.
Install New Fixtures and Plumbing
Set the toilet flange and tub or shower pan before installing wall finishes, and test every connection with water before covering anything. Use new supply lines and a fresh wax ring or gasket at the toilet. Dry fit the vanity to check that the drain and supply lines line up with the cabinet cutouts.
Plumbing work can trigger local permit and inspection requirements, and some jurisdictions treat manufactured homes differently from site-built homes. Check with your local building department before you start. If you are unsure about any connection, see our notes on Plumber for Bathroom Remodel: When You Need One and How to Hire Well, which explains when to bring in a licensed plumber.
Choose Ventilation, Lighting and Finishes
A small bathroom traps moisture quickly, so the exhaust fan matters as much as the tile. Choose a fan rated for the room size and make sure it vents outdoors through the sidewall or roof. Many owners report that a fan with a humidity sensor helps keep the room dry without running it manually.
For finishes, a light color on the walls and a matte or textured tile on the floor reduce glare and slipping. Keep the layout simple: one or two focal points, such as a large mirror or a single accent tile band, usually look better than many competing patterns in a compact room.
Choose finishes you can clean easily. In a small bathroom, grout lines, caulk joints and grab bar placement are the details you will live with every day.
Common mistakes
- Skipping the subfloor inspection and tiling over soft material, which leads to cracked tile within a year or two.
- Using standard drywall or regular cement board in the shower instead of moisture-resistant products.
- Installing a vanity that is too deep for the wall, blocking the door or the toilet clearance.
- Forgetting to add blocking in the walls for grab bars, towel bars and a future wall-mounted sink.
- Choosing a bathtub that is difficult to access on the trailer’s narrow floor plan.
- Sealing the bathroom too tightly without adequate ventilation, which encourages mold growth.
Recommended gear
These tools and supplies come up often in trailer home bathroom work. Check the product details for compatibility with your materials before buying.
- Oscillating multi-tool makes precise cuts in subfloor and flooring transitions without damaging nearby framing. View on Amazon
- Moisture meter helps you map wet subfloor areas before you commit to a repair plan. View on Amazon
- Cement backer board provides a stable, moisture-tolerant base for tile in showers and tub surrounds. View on Amazon
- Liquid waterproofing membrane seals seams and corners in wet areas when applied in the manufacturer’s recommended thickness. View on Amazon
FAQ
How long does a trailer home bathroom remodel usually take?
Timelines depend on the scope. A cosmetic update with new flooring, paint and a vanity may take a few days. A full gut with subfloor repair, new plumbing and tile can stretch to several weeks, especially if you need to wait for inspections or special-order fixtures.
Can I replace the bathtub with a shower in a trailer home?
Often yes, but it depends on the drain location and the floor structure. A shower pan has different framing and drain requirements than a tub, so check whether the existing plumbing can be adapted before you order a unit.
What flooring works best in a trailer home bathroom?
Luxury vinyl plank and sheet vinyl are common choices because they resist water and are relatively light. Laminate and solid wood are generally poor choices in wet areas. Check manufacturer guidance for your specific product.
Do I need a permit for a trailer home bathroom remodel?
Permit rules vary by state and locality. Plumbing, electrical and structural changes are most likely to require a permit. Contact your local building department before starting to confirm requirements.
Should I hire a plumber or do the plumbing myself?
Simple fixture swaps may be within reach for a careful DIYer, but new drain lines, gas connections and any work that needs an inspection are better left to a licensed professional. Consult a professional for any plumbing task you are not confident about.
How do I prevent mold in a small bathroom?
Run an exhaust fan during and after showers, wipe down wet surfaces, and keep the door open to allow airflow. Use mold-resistant caulk and grout, and fix leaks promptly. Persistent mold may point to a moisture source that needs professional evaluation.
Is it worth keeping the original bathroom layout?
Keeping the existing drain and supply locations usually saves time and reduces the risk of disturbing the subfloor and chassis. Moving plumbing is possible but adds complexity, so weigh the layout gains against the extra work.
Conclusion
A successful trailer home bathroom remodel starts with a careful inspection, a solid subfloor and thorough waterproofing. Once those basics are right, the fixtures and finishes are the fun part. Plan your layout, check local permit requirements, and bring in a professional for any structural or plumbing work you are unsure about.
Related reading
- Small Bathroom Design Remodel: A Practical Guide (2026)
- Remodel a Bathroom Ideas: 8 Layout, Storage and Finish Choices That Work
Ready to choose one?
About Owen Palmer
Owen Palmer is part of our editorial team and reviews and edits our DIY home renovation guides, checking product details against manufacturer specifications and owner feedback.