By Evelyn Bennett
Choosing designs for bathroom remodel projects is easier when you start with how the room gets used, not with paint chips. In this guide you will learn how to pick a layout, sort out storage, select finishes that hold up to moisture, and plan lighting, so your renovation looks intentional from the first day. We will walk through each decision in order, with measurements and a checklist you can take to the hardware store.
Start With How the Bathroom Is Actually Used
Before you fall for a tile pattern, write down the daily routine of everyone who uses the room. A household of two adults with work schedules that overlap needs a different plan than a family with young kids who need a bathtub and a step stool. Note how many people use the room in the morning, whether anyone needs accessible clearances, and where the most time is spent: showering, grooming, laundry or storage.
This short audit usually reveals the one or two problems the design must solve. Maybe the door swings into the only usable wall. Maybe the vanity drawers jam against the toilet. Naming these issues first keeps the rest of your choices focused.
Questions to Answer on Paper
- How many people use the bathroom at the same time during a typical weekday morning?
- Do you need a tub, a shower, or both? Is a walk-in shower with a low threshold worth the trade-off?
- Where do towels, toiletries, cleaning supplies and backup rolls live right now, and where should they live?
- Which features must stay, such as a window for ventilation or an existing drain location?
- How long do you plan to stay in the house? This affects how personal your finishes can be.
Choose a Layout That Fits the Footprint
Most bathroom remodels work within the existing plumbing, so the layout is really about moving the door, the vanity, the shower and the toilet within a fixed set of constraints. Measure the room to the nearest quarter inch, including window and door locations, and sketch it to scale on graph paper. A scale of 1/2 inch to 1 foot works well for most rooms.
Keep these clearances in mind as you place fixtures. Plumbing and building codes vary by location, so confirm local requirements with your building department.
| Fixture or Area | Typical Clearance to Plan For |
|---|---|
| Toilet centerline to side wall | About 15 inches on each side |
| Clear space in front of toilet | About 21 inches |
| Clear space in front of vanity | About 30 inches |
| Door swing | Keep clear of the toilet and vanity door |
| Shower interior (standard) | At least 30 by 30 inches |
Common Layout Patterns
Three layouts cover most homes. A linear layout puts the vanity, toilet and tub along one long wall, which suits narrow rooms. A split layout separates the toilet and shower into a private compartment from the vanity area, a good choice for shared bathrooms. An open layout uses a frameless glass shower and a freestanding tub, which can make a modest room feel larger if the floor is continuous.
Design Storage Before You Pick Finishes
Storage problems are the most common regret after a bathroom remodel. Plan for cabinetry, medicine storage, linen storage and shower niches before you order the vanity. A single 24-inch vanity with two deep drawers often holds more than a 36-inch vanity with one cabinet door, because drawers let you reach items at the back.
Recessed medicine cabinets fit between studs and free floor space. Confirm the stud spacing and wiring location before you cut. Shower niches are typically framed at 12 to 16 inches high, placed well above the showerhead spray pattern and out of direct water flow where possible.
Select Finishes That Handle Moisture
Bathroom finishes take more abuse than almost any other room in the house. Choose materials rated for wet areas, and pay attention to grout, sealers and the substrate underneath. Our article on Bathroom Tile and Waterproofing Basics covers membranes and substrate prep in more detail, and it is worth reading before you commit to a tile layout.
Floor and Wall Materials
Porcelain and ceramic tile remain the most common choices for floors and shower walls because they are dense and easy to clean. Large-format tiles reduce grout lines, which many people prefer for a cleaner look, but they require a flat substrate and careful installation. Luxury vinyl plank is sometimes used in bathrooms, but check that the manufacturer rates it for wet installation. For guidance on choosing and laying flooring, see Choosing and Installing Bathroom Flooring Materials.
Grout and Caulk Choices
Grout color has a large effect on how the room looks and how easily it stains. Lighter grout shows dirt faster, while mid-tone or dark grout hides discoloration. Use caulk at the junctions between tub, shower and tile, and avoid grout in corners where movement occurs. Our guide to Selecting and Maintaining Bathroom Grout and Caulk explains product types and cleaning routines.
Plan Lighting in Layers
Bathroom lighting needs three jobs: overall ambient light, focused task light at the mirror, and a softer glow for relaxing. Many remodels fail because they rely on a single ceiling fixture that casts shadows on faces. Mount vanity lights at roughly eye level on either side of the mirror, about 75 to 80 inches above the floor, so light falls evenly on your face.
Use a damp-rated or wet-rated fixture for any light near the shower or tub, and confirm the rating with the manufacturer. Choose a color temperature between 2700K and 3000K for a warm, flattering glow, or 3500K to 4000K if you need crisp task lighting for shaving or makeup.
Plan Ventilation and Heating
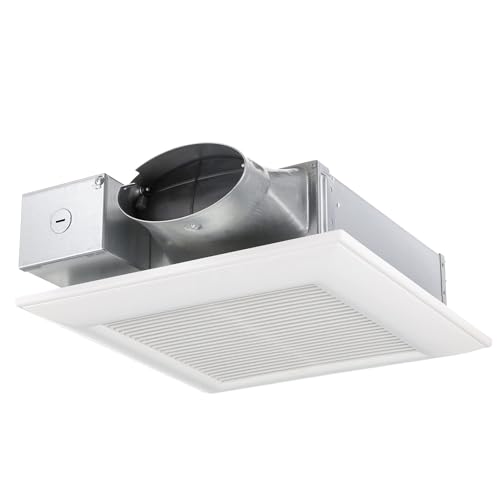
Moisture control is part of the design, not an afterthought. A properly sized exhaust fan removes humid air and protects paint, drywall and ceiling framing. The fan rating is usually given in cubic feet per minute, and many guides suggest about 1 CFM per square foot of floor area as a starting point, with higher ratings for large or steam-heavy rooms. Vent the fan to the exterior, not into the attic.
Step-by-Step Planning Checklist
- Measure the room and note window, door, plumbing and electrical locations.
- Write down daily routines and the three biggest frustrations in the current bathroom.
- Sketch two or three layouts to scale and test door swings and clearances.
- Decide on storage needs and count the items each cabinet must hold.
- Select waterproof-rated flooring, wall materials, grout and caulk.
- Plan lighting in three layers and mark fixture locations on the sketch.
- Choose an exhaust fan rated for the room size and confirm the duct route.
- Get permits and inspections lined up with your local building department before demolition.
Tools and Materials to Have on Hand
Most design decisions turn into shopping lists, so gather the basics before you start. A tape measure, a level, a stud finder, a moisture meter for checking the substrate, and a notched trowel for tile are useful throughout the project. Keep a notebook for dimensions, product codes and paint numbers so you do not have to re-measure later.
Common Mistakes
- Skipping the clearance check. A vanity that looks fine on paper can leave no room to open the toilet lid or the cabinet doors.
- Ignoring the substrate. Tile on an unprepared or flexing floor cracks, no matter how good the tile is.
- Choosing one light source. A single overhead fixture leaves faces in shadow at the mirror.
- Underbuying ventilation. An undersized fan lets condensation build up and damage finishes over time.
- Picking trendy colors for permanent surfaces. Save bold choices for towels, paint or accessories that are easy to change.
- Forgetting the shower niche height. Niches set too low collect water and are hard to reach.
Tips for a Cohesive Look
Limit your main materials to two or three, and repeat them in different places. For example, pair a matte white floor tile with a wood-tone vanity and a brushed brass faucet. Repeating the metal finish across the faucet, shower valve and cabinet pulls creates a sense of order. Pick one accent color and bring it in through a towel set, a rug or a wall niche. If you are working in a smaller space, Small Bathroom Renovation: Space Planning, Storage and Lighting offers additional ideas for making every inch count.
Once your layout and finishes are set, you can narrow down fixtures. Types of Bathroom Faucets and How to Install Them and How to Choose the Right Fixtures for a Small Bathroom cover the next decisions in the process.
FAQ
What is the most important factor in bathroom remodel design?
Layout comes first. Fixed plumbing, door swing and clearances limit what is possible, so solving the traffic flow and storage needs before choosing finishes usually prevents costly changes later.
How much space do I need between the toilet and the vanity?
Plan for at least 21 inches of clear floor space in front of the toilet. Keep the vanity far enough away that the door and the toilet lid can open without hitting each other.
Can I use luxury vinyl plank in a bathroom?
Yes, if the manufacturer rates the product for wet areas and you install it over a properly prepared, moisture-resistant subfloor. Seal seams and edges according to the manufacturer’s instructions.
What color temperature works best for bathroom lighting?
Most people prefer 2700K to 3000K for a warm, relaxing feel. For makeup and shaving, 3500K to 4000K gives crisper light. Many remodels use both, with a dimmer to adjust.
How do I size a bathroom exhaust fan?
A common starting point is about 1 CFM per square foot of floor area, with higher ratings for large rooms or those with steam showers. Check the manufacturer’s sizing guidance and local code requirements.
Should I choose a tub or a walk-in shower?
It depends on who uses the room and how much space you have. A tub helps families with young children and offers a soaking option, while a walk-in shower with a low threshold is easier to access and clean.
Do I need a permit for a bathroom remodel?
Permit rules vary by city and by scope of work. Moving plumbing, adding circuits or changing the layout often requires a permit. Check with your local building department before starting.
Is professional help needed for electrical or plumbing changes?
Electrical and plumbing work carry safety and code risks. Consult a licensed electrician or plumber for any new circuits, relocated drains, or gas lines, even if you handle the rest of the project yourself.
Conclusion
Strong designs for bathroom remodel projects begin with how the room is used, then move to layout, storage, moisture-resistant finishes, and layered lighting. Measure carefully, sketch options to scale, and make decisions in that order. Your bathroom will feel calmer and work better every day once the plan is set.
Related reading
- Small Bathroom Design Remodel: A Practical Guide (2026)
- Designing a Small Bathroom Remodel: 8 Steps to Make It Feel Bigger
- Bathroom Remodeling Guide: Planning a Bathroom Remodel
- Types of Bathroom Faucets and How to Install Them

About Evelyn Bennett
Evelyn researches and writes buying guides and how-to articles on diy home renovation. Picks are based on product specifications, brand reputation and patterns in owner feedback, and are updated as new models come out.