By Claire Russell
As an Amazon Associate I earn from qualifying purchases. This page may contain affiliate links.
To remodel a very small bathroom, you plan the space around how you actually use it, then make the room feel larger through layout, light, storage and surfaces. In this guide, we walk through the full process we followed in our own compact bathroom: measuring, planning the layout, choosing fixtures, demolition, rough-in work, finishing and final checks. By the end, you will have a clear sequence to follow and a realistic idea of how long each stage takes.
Start With an Honest Measurement of the Room
Very small bathrooms often measure somewhere between 3 and 5 feet on the short side, which leaves almost no margin for error. Before you buy anything, measure every wall at floor level and again at about 36 inches up, since walls are rarely perfectly square. Note the location of the door swing, the window, the supply lines, the drain stack and any vent pipe.
Sketch the room on graph paper at a scale of 1 inch to 1 foot. Mark the clearances the code and common sense require: roughly 21 inches in front of the toilet, about 15 inches from the toilet centerline to the nearest side obstruction, and enough room in front of a vanity for someone to stand and open a drawer. Check your local building code for exact figures, since requirements vary by jurisdiction.
Measurement Checklist
- Room length and width at floor, mid-height and ceiling
- Door width and swing direction
- Window size, sill height and whether it opens
- Location of the drain, supply lines and vent stack
- Subfloor condition and total floor height (affects door clearance)
- Ceiling height and any soffits
- Electrical circuit and existing outlet and switch positions
Plan the Layout Before You Pick Finishes
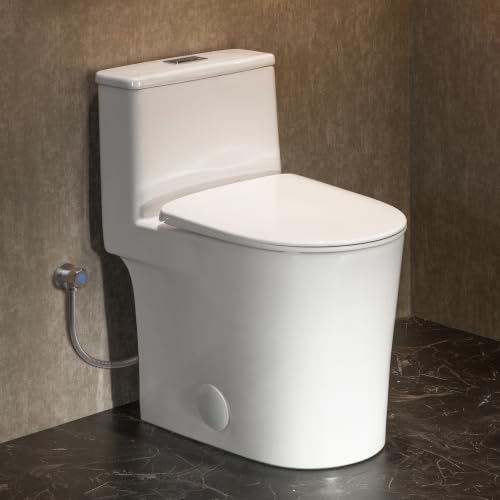
Layout drives almost every other decision. In a very small bathroom, the most common options are a standard layout with the toilet and vanity on opposite walls, a linear layout with fixtures in a row, and a corner layout that uses a wall-hung toilet and a corner vanity. A wall-hung toilet frees floor space and makes the room look more open, though it requires a carrier frame and a wall that can take the load.
Consider whether a shower, a tub or a shower-tub combination makes sense. A standard tub takes up a significant footprint, while a walk-in shower with a glass panel keeps sight lines open. If you must keep a tub, a recessed or alcove tub with a sliding or pivot door can still work, but measure carefully.
Choosing a Door Style
Swing-out doors can free up interior space, but they take up hallway room. A pocket door saves the most floor space, though it requires a wall cavity free of plumbing and wiring, and it adds cost to the framing work. A barn-style door mounted on the outside of the wall is another option, though it needs enough wall length to slide clear of the opening.
Step 1: Set a Realistic Budget and Timeline
Break your budget into categories: demolition and disposal, plumbing, electrical, framing and drywall, waterproofing, tile, fixtures, vanity, lighting and ventilation, and paint or finishes. Leave a contingency of about 15 percent for surprises, since old subfloors, hidden water damage and outdated wiring are common in small baths. For a DIY project, most homeowners find that a very small bathroom takes two to four weeks of part-time work, with extra time for drying, curing and inspections.
Step 2: Demolish and Inspect Carefully
Shut off the water at the supply valves or the main, and cap the lines before you disconnect anything. Remove the toilet, vanity, tub or shower, and any old flooring down to the subfloor. Once the walls are open, look for soft or discolored subfloor, rust on supply lines, mold and signs of past leaks. Replace any rotted subfloor or framing before going further.
Pull out old exhaust fans and check that the vent ducts run to the exterior, not into the attic. Many small bathrooms lack adequate ventilation, which leads to mold and peeling paint.
Step 3: Handle Rough Plumbing and Electrical
Moving a toilet or drain even a few inches can require cutting into the floor and adjusting the drain slope, which is typically about 1/4 inch per foot for horizontal runs. Keep the drain as close to its original location as you can. Supply lines for a sink or toilet should be routed to the new positions and tested under pressure before the walls are closed.
Electrical work in bathrooms usually requires GFCI protection for receptacles and a dedicated circuit for certain loads. Ceiling-mounted fans and vanity lights need proper boxes rated for their weight. If you are not confident with wiring, hire a licensed electrician for this stage. Consult a professional for any plumbing or electrical work you are unsure about, since mistakes can cause leaks, fires or code violations.
Step 4: Frame, Insulate and Install Backer Board
Use moisture-resistant drywall or cement backer board in wet zones, including around the shower and along the tub wall. Waterproof membranes should be applied behind shower tile according to the manufacturer’s directions. Insulate exterior walls to reduce condensation on cold surfaces, which helps limit mold growth.
Before you close the walls, check that blocking is in place for grab bars, towel bars and any heavy vanity or mirror mounting. Blocking is easy to add now and very hard to add later.
Step 5: Choose Surfaces That Reflect Light
Light, bright finishes make small rooms feel open. Large-format tiles, with fewer grout lines, read as more continuous and are easier to clean. Matte or satin finishes reduce glare, while glossy tiles bounce more light. Keep the color palette tight, with two or three colors at most, to avoid visual clutter. Use the same flooring material throughout the room and, if possible, carry it under the vanity to create a sense of continuity.
For a more detailed look at flooring options, see Choosing and Installing Bathroom Flooring Materials. If you are laying tile on the walls or floor, Bathroom Tile and Waterproofing Basics covers the sequence and membranes in more depth.
Step 6: Select Fixtures and Storage That Fit
In a very small room, every fixture needs to earn its footprint. A wall-hung vanity or a narrow vanity around 18 to 24 inches deep can recover floor space, while a recessed medicine cabinet adds storage without protruding into the room. Choose a faucet with a low profile so it does not crowd the sink basin.
Vertical storage is often more useful than floor cabinets. A tall, narrow cabinet beside the toilet, a wall-mounted shelf above it, or a ledge in the shower niche keeps items off the floor and off the counter.
Fixture Selection Table
| Fixture | Space-Saving Option | Main Tradeoff |
|---|---|---|
| Toilet | Wall-hung with in-wall tank | Requires carrier frame and reinforced wall |
| Vanity | Narrow or wall-mounted | Less counter and drawer space |
| Shower | Walk-in with glass panel | Glass needs regular cleaning |
| Door | Pocket or barn-style | Needs wall cavity or clear wall length |
| Mirror | Full-wall or recessed cabinet | Requires careful blocking and mounting |
For guidance on picking the right pieces, see How to Choose the Right Fixtures for a Small Bathroom and Small Bathroom Renovation: Space Planning, Storage and Lighting. If you plan to replace the vanity, Bathroom Vanity Buying Guide compares sizes and mounting types.
Step 7: Plan Lighting and Ventilation
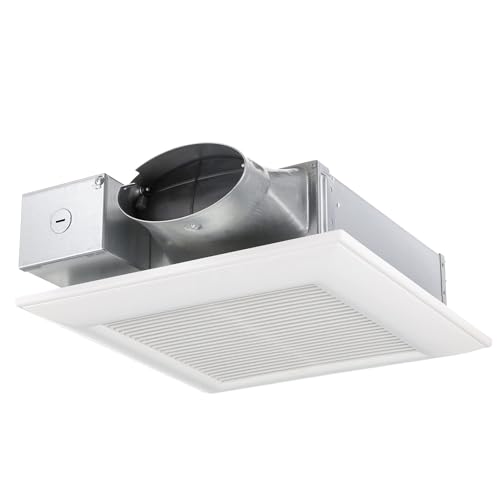
Layer your lighting. Use a ceiling fixture for general light, and place vanity lights at eye level on either side of the mirror, which avoids harsh shadows. Choose a color temperature around 2700 to 3000K for a warm feel, or 4000K for a cleaner, more daytime look. Use a fan rated for the room size, and make sure it vents outdoors. Many building codes specify minimum airflow for bathrooms, so check yours before buying.
For fan selection, 16 Best Bathroom Exhaust Fans reviews options by size and noise level.
Step 8: Install Fixtures, Finishes and Mirror
Set the toilet with a new wax ring or seal, tighten the flange bolts evenly, and check that the base sits flat. Install the vanity level, anchored into studs or blocking. Connect the faucet and supply lines, then hang the mirror and medicine cabinet. For faucet and drain details, Types of Bathroom Faucets and How to Install Them walks through common installs. Seal the vanity top and backsplash with a flexible silicone or polyurethane sealant, and use the correct grout for your tile, as explained in Selecting and Maintaining Bathroom Grout and Caulk.
Step 9: Test Everything Before You Close Up
Run water through each fixture for at least 10 minutes and check every joint for drips. Flush the toilet several times. Test the shower with the drain covered to check for leaks at the pan. Run the fan and confirm airflow at the exterior vent. Check that every outlet is GFCI protected and that switches work.
Final Checklist
- No leaks at any joint after 24 hours of use
- Drain flows freely at sink, tub and shower
- Fan moves air outward and runs quietly
- Caulk and grout are fully cured before heavy use
- Grab bars anchored into blocking, not just drywall
- Inspection passed, if your jurisdiction requires one
Common Mistakes
- Skipping ventilation. Undersized or missing fans cause mold and paint failure within a few seasons.
- Choosing a vanity by its look alone. Measure door width and clearance first, since oversize furniture is hard to get through a small door.
- Using dark, busy patterns everywhere. Small rooms look smaller with heavy contrast and many grout lines.
- Forgetting blocking. Grab bars and heavy mirrors need solid backing.
- Underestimating waterproofing. Shower walls and floors need a continuous membrane, not just tile.
- Rushing cure times. Thinset, grout and sealant need full curing before they are stressed.
Recommended gear
- Laser distance measure lets you record wall lengths quickly and accurately, which matters when clearances are tight. View on Amazon
- Moisture-resistant cement backer board is the standard substrate behind tile in wet areas and is easier to cut than many alternatives. View on Amazon
- Modified thinset mortar bonds tile to backer board and handles the moisture a shower sees. View on Amazon
- Silicone bathroom sealant provides a flexible, waterproof joint at tubs, showers and vanity edges. View on Amazon
FAQ
What is the minimum size for a functional bathroom?
Many people consider a bathroom with a toilet, sink and shower workable at around 5 feet by 7 feet, though code minimums and personal preference vary. Smaller rooms are possible with a wall-hung toilet, a narrow vanity and a shower-only layout.
Can I remodel a very small bathroom without moving the plumbing?
Yes. Keeping the toilet, drain and supply lines in place is the simplest and least expensive route. You can still change the vanity, flooring, lighting, mirror and paint without touching the rough plumbing.
How do I make a small bathroom feel bigger?
Use light colors, large-format tiles, a frameless or glass shower enclosure, a mirror that reflects light, layered lighting and vertical storage. Keeping the floor clear and using the same flooring throughout also helps.
Do I need a permit to remodel a small bathroom?
It depends on the scope. Cosmetic work like painting and replacing a vanity usually does not require a permit, but moving plumbing, adding circuits or changing the layout often does. Check with your local building department before starting.
What ventilation do I need in a small bathroom?
Many codes call for a fan that vents to the outside, sized to the room volume. Check your local code for the required airflow rating, and make sure the duct is not simply dumping air into the attic.
Should I hire a professional or do it myself?
Many homeowners handle demolition, painting, tiling, and fixture swaps themselves. Plumbing and electrical work, and any structural changes, should be done by a licensed professional in most areas. Consult a professional for any work you are not confident doing safely.
How long does it take to remodel a very small bathroom?
For a DIY homeowner working part-time, two to four weeks is a common range for a full gut renovation, depending on how much plumbing and electrical work is involved and how long materials need to cure.
Conclusion
Remodeling a very small bathroom comes down to careful measurement, a layout that fits how you use the room, and surfaces and storage that keep the space feeling open. Work in the right order: plan, demolish, handle rough-in, finish, then test. Take extra care with waterproofing, ventilation and blocking, since those are the areas that cause the most trouble later. With a clear plan, a small bathroom can end up being the most functional room in the house.

About Claire Russell
Claire writes about diy home renovation. Each guide starts with research into how products are built and what owners report after months of use, and is revised when better options appear.