By Claire Russell
As an Amazon Associate I earn from qualifying purchases. This page may contain affiliate links.
A small bathroom design remodel comes down to three things: measuring your space accurately, choosing fixtures that fit the footprint, and building in storage and light so the room feels larger than it is. By the end of this guide, you will have a clear plan for layout, fixtures, finishes and the order of work, so you can start demo with confidence. Our own bathroom was about 5 by 7 feet, and most of the lessons below came from making that room work for two people.
Step 1: Measure and Map the Existing Space
Before you think about tile colors or vanities, measure everything. Small rooms leave almost no margin for error, and a half-inch mistake in a vanity location can stop a door from closing.
- Measure the room length and width at floor level, then again at 36 inches up (where the walls often shift because of old drywall or tile).
- Record the locations of the door swing, window, existing drain, supply lines, vent stack and any electrical boxes.
- Note the ceiling height and any soffits or bulkheads.
- Sketch the room on graph paper at a scale of 1/2 inch to 1 foot, or use a free floor-planning app.
Mark the door swing on your sketch. In a small bathroom, an inward-swinging door can consume a surprising amount of floor, and switching to a pocket door or an outward swing is often the biggest single gain in usable space.
Step 2: Choose a Layout That Fits the Footprint
Most small bathrooms fall into one of a few layouts. Each has trade-offs for clearance, plumbing changes and cost of work. Use the table below to compare them before you commit.
| Layout | Best for | Clearance to watch | Plumbing changes |
|---|---|---|---|
| Linear (vanity, toilet and tub/shower along one wall) | Narrow rooms, 5 to 6 feet wide | Keep about 21 inches in front of the toilet and vanity | Usually none if fixtures stay put |
| Opposing walls (vanity on one side, toilet and shower on the other) | Rooms 6 to 8 feet wide | Maintain at least 30 inches of walk space between opposing fixtures | Moderate if the toilet moves |
| L-shaped (shower in a corner, vanity on the adjoining wall) | Square rooms around 6 by 6 feet | Corner shower needs a usable door opening of about 22 inches or more | Moderate, mainly the drain location |
| Wet room (open shower with a curbless floor) | Rooms where accessibility or a clean look matters most | Slope the floor toward the drain and plan for splash control | Significant, requires floor framing and waterproofing |
If you are unsure about moving drains or vent lines, get a licensed plumber to confirm the feasibility before you finalize the design. Changes to drain slope and venting are easy to get wrong and hard to fix once tile is down.
Standard Clearances to Plan Around
- About 15 inches from the center of the toilet to any side wall or cabinet, and about 21 inches of open floor in front of it.
- At least 24 inches of clear space in front of a vanity, so the door can swing and a person can stand at the sink.
- A shower or tub opening of at least 22 inches for a shower door, and a minimum shower interior of about 30 by 30 inches.
- Door openings of at least 24 inches of clear width, which often means choosing a pocket or barn-style door.
Building codes and manufacturer specifications vary by location, so check your local code and the installation guide for each fixture.
Step 3: Select Fixtures Sized for Small Rooms
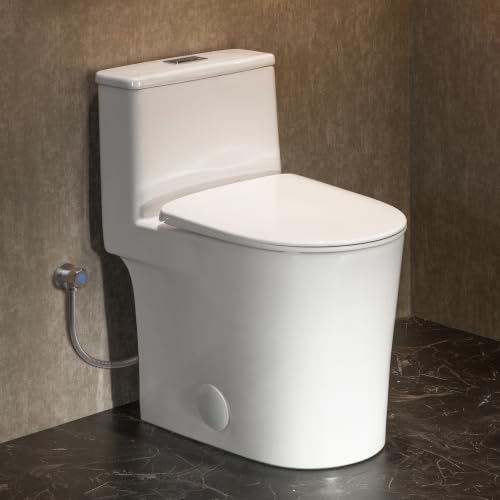
Fixtures make or break a compact layout. A wall-hung toilet, for example, frees floor space and makes cleaning easier, but it needs a reinforced wall and an in-wall tank. A narrower vanity of 24 to 30 inches often gives the best balance of storage and clearance. For a deeper look at sizing and style, see How to Choose the Right Fixtures for a Small Bathroom.
When choosing a faucet, consider a wall-mounted model if you want to free up counter space, or a single-hole faucet on a compact vanity top. Types of Bathroom Faucets and How to Install Them walks through the install differences in more detail.
Choosing a Vanity or Sink
Wall-hung sinks with a shallow basin (about 14 to 16 inches front to back) maximize floor space. A vanity with drawers usually gives more usable storage than a open cabinet with doors, because you can reach items at the back without emptying the whole shelf. If you are comparing options, Bathroom Vanity Buying Guide covers sizes and construction in depth.
Step 4: Build In Storage Without Crowding the Room
In a small bathroom, every inch of wall should earn its keep. Focus storage in three zones: above the toilet, inside the wall, and at the vanity.
- Recessed niches: Frame a niche between two studs, typically 14 to 16 inches wide and 24 to 30 inches tall, for shampoo and towels. Set it so it sits outside the shower spray zone.
- Over-toilet cabinet or shelf: A slim cabinet about 8 to 10 inches deep can hold toilet paper and supplies without projecting into the walk space.
- Medicine cabinet: Recessed cabinets save floor and wall depth. Plan the rough opening before the drywall goes up, and check that the cabinet does not conflict with the exhaust fan or light box.
Mirror choice also affects how open the room feels. You can find practical guidance on sizing and hanging in Choosing and Mounting Different Bathroom Mirror Styles.
Step 5: Plan Lighting and Ventilation
Lighting and ventilation are easy to undersize in a small room and hard to add later. Layer your lighting: overhead ambient light, task lighting at the vanity (ideally at face height on either side of the mirror), and a dimmer or nightlight for early-morning use.
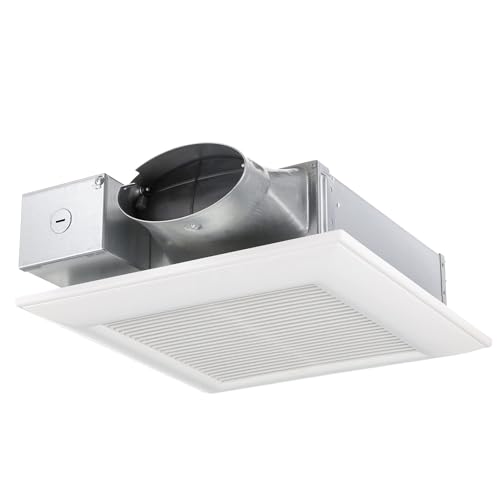
Ventilation matters even more. Moisture from a shower can damage paint, drywall and fixtures within months if it is not removed. Size the exhaust fan according to the room’s volume and the manufacturer’s CFM guidance, and route ductwork to the outside, not into the attic. 16 Best Bathroom Exhaust Fans compares the main fan types, and our tip is to choose a model with a humidity sensor for small rooms where moisture builds quickly.
Step 6: Choose Materials for Light, Durable Surfaces
Large-format tile, around 12 by 24 inches, creates fewer grout lines and makes a small room look more continuous. Light colors and a consistent palette do the same. Two other choices matter in a small bathroom.
- Flooring: Use water-resistant materials like porcelain tile or luxury vinyl plank. Check the slip rating (for wet areas, look for a higher coefficient of friction). Choosing and Installing Bathroom Flooring Materials covers the options.
- Wall protection: Cement board or a waterproofing membrane behind the tile is essential in wet zones. Bathroom Tile and Waterproofing Basics explains the layers and why they matter.
Grout and sealant are often overlooked. Use a sanded grout for joints wider than about 1/8 inch and a silicone or mildew-resistant sealant at fixture edges. Selecting and Maintaining Bathroom Grout and Caulk has the details on choosing and maintaining them.
Step 7: Sequence the Work
A small bathroom remodel moves through the trades in a fixed order. Working out of sequence usually means tearing out finished work.
- Demolition and removal of old fixtures, tile and drywall.
- Framing changes and blocking for grab bars, cabinets or a mirror.
- Rough plumbing, electrical and ventilation.
- Inspection of rough-in work, if your jurisdiction requires it.
- Waterproofing, backer board and tile setting for wet areas.
- Drywall or paint on dry walls, then grout and sealant.
- Vanity, toilet, shower trim, mirror and lighting installation.
- Final inspection and cleanup.
If you are new to installing a vanity, our walkthrough on How to Install a Bathroom Vanity: A DIY Guide shows the leveling and supply-line steps. For broader planning, the Bathroom Remodeling Guide: Planning a Bathroom Remodel covers scheduling and permits.
Common Mistakes to Avoid
- Ordering fixtures before measuring the rough-in locations. A toilet with a 12-inch rough-in will not fit a 10-inch drain.
- Ignoring the door swing. A vanity that blocks a door opening is one of the most frequent layout errors.
- Choosing dark tile and matte finishes in a windowless room, which can make the space feel smaller and gloomier.
- Skimping on the exhaust fan. Undersized fans leave moisture behind and invite mold.
- Using tile in the shower without a continuous waterproofing layer behind it.
- Placing storage where it blocks the walk path or the shower spray.
Tips for a Better Result
- Mock up the layout with painter’s tape on the floor at full size. Walk through it with the door closed and open.
- Use mirrors across from a window or light source to bounce light into the room.
- Choose a vanity with a visible light or a recessed shelf to add depth without adding footprint.
- Keep the same tile color or a close tone on floor and shower walls to visually extend the space.
- Install blocking for future grab bars now, even if you do not need them yet.
Recommended Gear
These tools and supplies make the measuring, tiling and sealing steps more accurate. Check compatibility with your materials before buying.
- Laser distance measure: Speeds up measuring of wall and floor dimensions and reduces the chance of recording a figure wrong. View on Amazon
- Tile leveling system: Helps keep large-format tiles flat and lippage-free during setting. View on Amazon
- Silicone sealant with mildew resistance: Suited to the tub-to-wall and shower-edge joints where water sits. View on Amazon
- Digital moisture meter: Lets you check the wall substrate for dampness before you tile or paint. View on Amazon
FAQ
What is the best layout for a small bathroom?
The best layout depends on the room’s shape and where the plumbing already sits. Linear layouts suit narrow rooms, while L-shaped or corner-shower layouts suit square ones. Keeping plumbing in place is the cheapest way to make a remodel work, so only move drains if the gain is clear.
How much clearance do I need in front of a toilet?
Most codes and fixture manufacturers call for about 21 inches of clear floor in front of the toilet, with about 15 inches from the centerline to the nearest side obstruction. Check your local code for the exact requirement.
Can a small bathroom have a bathtub?
Yes, but a combined tub and shower usually requires a tub of around 60 inches long, which is tight in a 5 by 7 foot room. A shower-only setup, or a narrower tub designed for small spaces, often gives better usable floor area.
Is a pocket door better than a swing door in a small bathroom?
In most small rooms, yes. A pocket door removes the swing arc from the floor plan, which frees space for a vanity or toilet. Installation requires an open wall cavity, so it is easiest during a full remodel.
What paint or finish works best in a small bathroom?
Use a moisture-resistant paint in a satin or semi-gloss sheen, which is easier to wipe clean than flat paint. Light neutral colors reflect more light and make the room feel larger. Prime any bare drywall with a moisture-resistant primer first.
How do I know if my bathroom needs a bigger exhaust fan?
Calculate the room’s volume in cubic feet and check the fan’s rated airflow in CFM. Many guides recommend about 1 CFM per square foot as a starting point, adjusted for ceiling height and whether you have a tub or large shower. Consult a licensed electrician or HVAC professional for ducting and wiring.
When should I hire a professional?
Hire a licensed plumber for any drain, vent or supply-line changes, and a licensed electrician for new circuits or relocated fixtures. Structural changes such as removing a wall or reinforcing for a wall-hung toilet should also be checked by a qualified contractor.
Conclusion
A successful small bathroom design remodel starts with accurate measurements, a layout that respects clearances, and fixtures and storage sized for the room. Plan lighting and ventilation early, sequence the work carefully, and avoid the common errors of ignoring door swings and undersizing the fan. With a clear plan, even a compact bathroom can feel bright, functional and comfortable to use every day.

About Claire Russell
Claire writes about diy home renovation. Each guide starts with research into how products are built and what owners report after months of use, and is revised when better options appear.