By Evelyn Bennett
As an Amazon Associate I earn from qualifying purchases. This page may contain affiliate links.
Remodeling a tiny bathroom comes down to one goal: making a small room feel open, useful and easy to clean without losing a single necessary fixture. In this guide we walk through how to plan a remodel tiny bathroom project, choose the right fixtures and storage, and sequence the work so you are not tearing out the same wall twice. By the end you will have a clear plan, a materials list and a sense of which upgrades give you the most visual space for the least disruption.
Start With an Honest Measurement and Layout Audit
Most tiny bathrooms are between 35 and 50 square feet, often with a tub-shower combo, a single vanity and a toilet squeezed into a narrow footprint. Before you shop for anything, measure the walls, the door swing, the window location, and the distance from the toilet centerline to the nearest side wall. Building codes and manufacturers generally call for at least 15 inches of clearance from the centerline of a toilet to any side obstruction and roughly 21 inches of open floor space in front of it, so check those numbers against your plan.
Map the Fixtures to the Walls
Sketch the room on graph paper at a scale of one square per six inches. Mark the door swing, the rough-in locations for the drain and water supply lines, and any vent stack. Note where the existing drain sits, because moving a toilet or shower drain can add significant plumbing work and cost. If the drain stays put, you can often change the vanity, mirror and lighting without touching the main lines.
Decide Whether to Keep the Tub or Convert to a Shower
A standard tub takes roughly 60 inches by 30 inches of floor area. Swapping it for a 36-inch or 42-inch shower base can open up a surprising amount of elbow room. The tradeoff is that you lose a bathing option, which matters if you have young children or a pet you bathe indoors. Many owners find a compact shower with a built-in niche and a glass panel makes the room feel lighter than a tub with a fabric curtain.
Nine Remodel Tiny Bathroom Ideas That Add Visual Space
The following upgrades are ordered roughly from least to most disruptive. You can combine several without redoing the whole room.
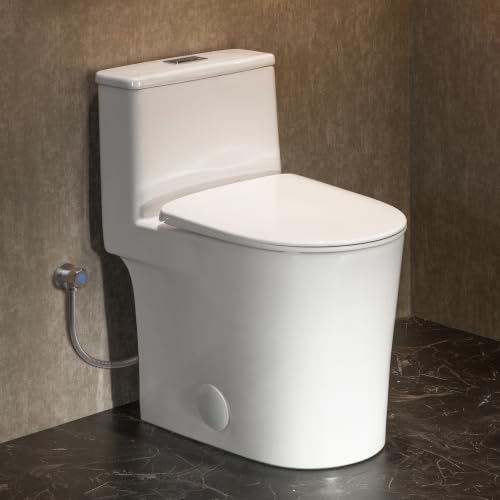
- Switch to a wall-hung toilet. Exposed floor under the bowl makes the floor read as larger and simplifies cleaning. It requires an in-wall carrier and a wall reinforcement, so plan this early.
- Use a narrow or wall-mounted vanity. A vanity 18 to 24 inches deep frees several inches of floor compared with a standard 21-inch base. Wall-mounted units lift off the floor entirely.
- Install a recessed medicine cabinet. Cutting into the stud bay between studs gives you storage without adding depth to the room. Most standard cabinets fit a 16-inch stud bay.
- Replace a swinging door with a pocket or barn door. A pocket door can free up a full door swing, which in a tiny room can be the single biggest gain in usable floor.
- Use large-format tile with minimal grout. Tiles 12 by 24 inches or larger reduce grout lines and make the floor and walls read as continuous surfaces.
- Add a full-height mirror or a mirror on the wall opposite the window. Reflected light and depth read as extra room.
- Layer lighting. Combine a ceiling fixture, a vanity light at eye level and a dimmable night light. Warm white at around 2700K to 3000K feels comfortable, and cooler 3500K to 4000K helps with grooming tasks.
- Choose a shower with a recessed niche. A niche eliminates the shampoo-caddy clutter that makes a small shower feel crowded.
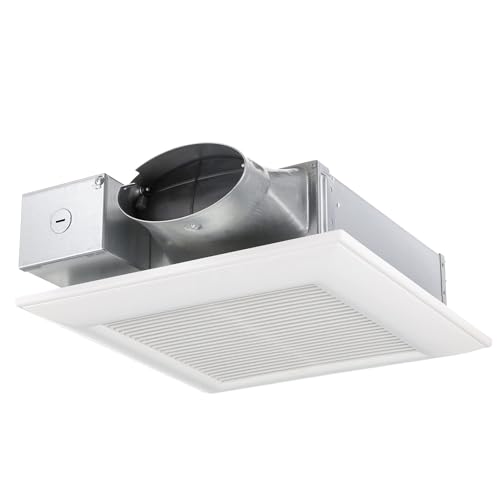
- Upgrade the ventilation. Tiny bathrooms trap humidity quickly, so a properly sized fan matters for paint, drywall and tile longevity.
Storage Ideas That Do Not Eat Floor Space
Think vertically. A tall, narrow linen cabinet about 12 inches deep fits beside the toilet. Shallow wall shelves above the toilet, sized 5 to 6 inches deep, hold towels and bins without projecting into the walkway. Inside the vanity, pull-out organizers and a drawer divider system beat a single deep cabinet because you can actually reach items at the back. For more detail on drawer and cabinet organization, see our guide on Smart Kitchen Cabinet Storage and Organization Ideas, where many of the same principles apply.
Fixtures, Faucets and Hardware for a Small Footprint
Scale matters. A large vessel sink on a small vanity can crowd the counter, while a slim wall-mounted faucet keeps the top clear. Single-handle faucets with a compact spout are generally the best fit. If you are weighing styles and installation requirements, our overview of Types of Bathroom Faucets and How to Install Them covers the common options. For the fixtures themselves, How to Choose the Right Fixtures for a Small Bathroom walks through sizing and clearance questions in more depth.
Choosing a Vanity Top
Integrated sink-and-top units are easier to clean and eliminate a joint where water can collect. A top around 24 inches wide is a common compromise for a tiny room. If you are comparing materials, see 14 Best Bathroom Vanity Tops and the Bathroom Vanity Buying Guide.
Step-by-Step Remodel Sequence
Doing the work in the right order prevents rework. The sequence below assumes you are gutting the room, not just swapping a few fixtures.
Step 1: Demolition and Inspection
Remove fixtures, tile and drywall down to the studs in the areas you are changing. Inspect the subfloor for rot, especially around the tub or toilet flange. Check the vent fan duct and the water shutoff valves. Shut off the water supply before any plumbing work and cap lines you are not using.
Step 2: Plumbing and Electrical Rough-In
Move drains, supply lines and vents as your layout requires. Run electrical for the fan, lights, outlets (GFCI protected within 6 feet of a water source), and any heated floor or towel warmer. Have licensed trades handle work that requires a permit in your area, and confirm the permit requirements with your local building department.
Step 3: Waterproofing and Backer Board
Install cement backer board or a foam board system in wet areas, then apply a waterproofing membrane at the shower and tub surround. Our overview of Bathroom Tile and Waterproofing Basics explains the membrane options and where each one belongs.
Step 4: Tile, Flooring and Grout
Set tile on a level floor, using a layout line centered in the room so cuts at the walls are balanced. Allow adhesive to cure before grouting, and seal grout according to the manufacturer’s instructions. For material choices, see Choosing and Installing Bathroom Flooring Materials and Selecting and Maintaining Bathroom Grout and Caulk.
Step 5: Vanity, Mirror and Trim
Set the vanity level and secure it to the wall studs. If you are doing this yourself, How to Install a Bathroom Vanity: A DIY Guide covers leveling, plumbing connections and anchoring. Hang the mirror at a height where the bottom edge sits about 40 to 42 inches above the floor for most adults, then adjust to suit your household.
Step 6: Paint, Fixtures and Finish Details
Use a paint rated for bathrooms with a satin or semi-gloss finish for moisture resistance. Install the toilet, faucets, showerhead and accessories last, then caulk all joints at the tub, shower and backsplash with a mildew-resistant silicone.
Materials and Tools Checklist
- Tape measure, level, stud finder and chalk line
- Oscillating multi-tool and utility knife for demolition
- Cement backer board, screws and thinset mortar
- Waterproofing membrane and corner fabric
- Tile cutter or wet saw and notched trowel
- Grout float, sponge and grout sealer
- Mildew-resistant caulk and caulk gun
- Bathroom-rated paint and primer
- Vent fan rated for the room’s cubic footage
Common Mistakes
- Skipping the ventilation upgrade. Tiny rooms fill with moisture fast, and a weak fan is the fastest route to mold on the ceiling.
- Choosing a vanity by appearance alone. Measure the door swing and the clearance in front of the vanity before buying.
- Using too many small tiles. Mosaic tile looks charming but adds grout lines that visually chop a small room into fragments.
- Ignoring the door swing. A door that opens into the toilet or vanity area can make the room feel unusable even when the fixtures technically fit.
- Underestimating lighting. One overhead fixture casts shadows on the face. Add vanity-level light.
- Forgetting to plan outlets. Place them for a hair dryer and toothbrush charger, not just code minimums.
Recommended gear
Two items earn their place in a tiny bathroom project. A bathroom-rated vent fan keeps moisture under control, and a stud-finder with deep scanning helps you locate blocking for wall-mounted fixtures.
- Broan-NuTone exhaust fan. A quiet, properly sized fan is the most important ventilation upgrade for a small room that gets steamy every day. View on Amazon
- Franklin stud finder. Locating studs precisely is essential before hanging a mirror or wall-mounted vanity. View on Amazon
Tips for a Smoother Tiny Bathroom Remodel
- Order fixtures before framing so rough-in dimensions match the actual product.
- Dry-fit the vanity and toilet with cardboard templates to confirm clearance.
- Keep a single paint color on the walls to make the room read as one volume.
- Schedule a plumber or electrician early, because they often have the longest lead times.
FAQ
What is the smallest practical size for a full bathroom?
A room around 35 square feet can hold a toilet, a sink and a stall shower if the layout is efficient. Anything smaller usually means a half bath or a compromise on clearance.
Do I need a permit to remodel a tiny bathroom?
Many jurisdictions require permits for plumbing, electrical and structural changes, even in small rooms. Check with your local building department before starting.
Is a wall-hung toilet worth it in a small room?
It can be, because the exposed floor visually enlarges the space and makes cleaning easier. It does require an in-wall carrier and reinforced framing, which adds to the project scope.
What paint finish works best in a bathroom?
A satin or semi-gloss finish resists moisture and wipes clean better than flat paint. Pair it with a paint labeled for bathrooms or high-humidity areas.
Can I DIY a tiny bathroom remodel?
Many homeowners handle demolition, painting, tile and vanity installation themselves. Plumbing and electrical work often need a licensed professional, and a consultation is wise before any work that affects gas, wiring or main drain lines.
How do I make a tiny bathroom feel bigger?
Use lighter colors, large tiles with minimal grout, a mirror across from the window, wall-mounted fixtures and a pocket or barn door that frees up swing space.
What tile size is best for a small floor?
Larger format tiles, such as 12 by 24 inches, reduce grout lines and make the floor feel continuous. Make sure the tile is rated for wet areas and has a slip-resistant finish.
Conclusion
A successful remodel tiny bathroom project depends on measuring carefully, choosing fixtures sized for the room and sequencing the work so plumbing, waterproofing and finishes happen in the right order. Focus on the upgrades that free floor space first, such as a slimmer vanity, a pocket door or a wall-hung toilet, and add storage and lighting to support daily use. Consult a licensed professional for any plumbing or electrical work, and check local permit requirements before you begin.

About Evelyn Bennett
Evelyn researches and writes buying guides and how-to articles on diy home renovation. Picks are based on product specifications, brand reputation and patterns in owner feedback, and are updated as new models come out.